We know, we know. Its the end of summer. But hey, look at your feet! Are you wearing flip flops? Of course you are. It’s only September. Why on earth would you be wearing anything else? We love flip flops so much we named our blog after them (clearly, we also love freedom). We’ve all seen the Pinterest boards with DIY flip flops, and we said to ourselves, “Hey! They’re not better than us!” So we took a trip to the craft store (obvi) and Old Navy ($2 flip flops!!!) to see if that was just crafting hubris.

Craft stores love me.
Something I would recommend is planning out your flippy floppies beforehand. It IS a lot of fun to run in and grab everything you see that would be pretty to hot glue onto a flip flop, but when you walk out of the store $75 later you may have some buyers’ remorse. KIDDING! Who would get buyers’ remorse at a craft store? That’s like saying you can get buyers’ remorse from Michael Kors. IT. JUST. DOESN’T. HAPPEN. However, if you are one of the few that is plagued by this increasingly prevalent infliction (thanks US economy!), I would recommend going in with a plan.
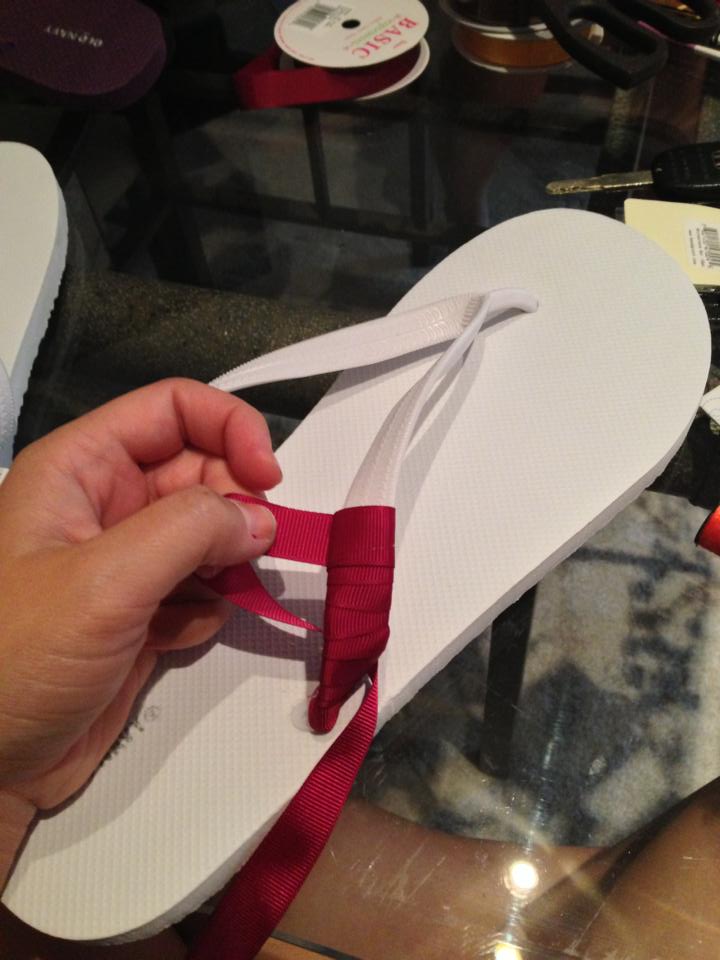
Let’s start off with a simple pair of flip flops. I made these for Big Sug. He is a big football fan. Can you guess his team? The ribbon wrapped flip flops are by far the easiest.
First, hot glue or stitch the ribbon to itself at the base of the thong. It has a better chance at survival if you wrap it and glue it to itself than wrapping and gluing to the plastic. Especially since it’s plastic. And the glue is hot. Hot plastic is NOT what’s up.
My feet are big…but these are definitely for Big Sug.
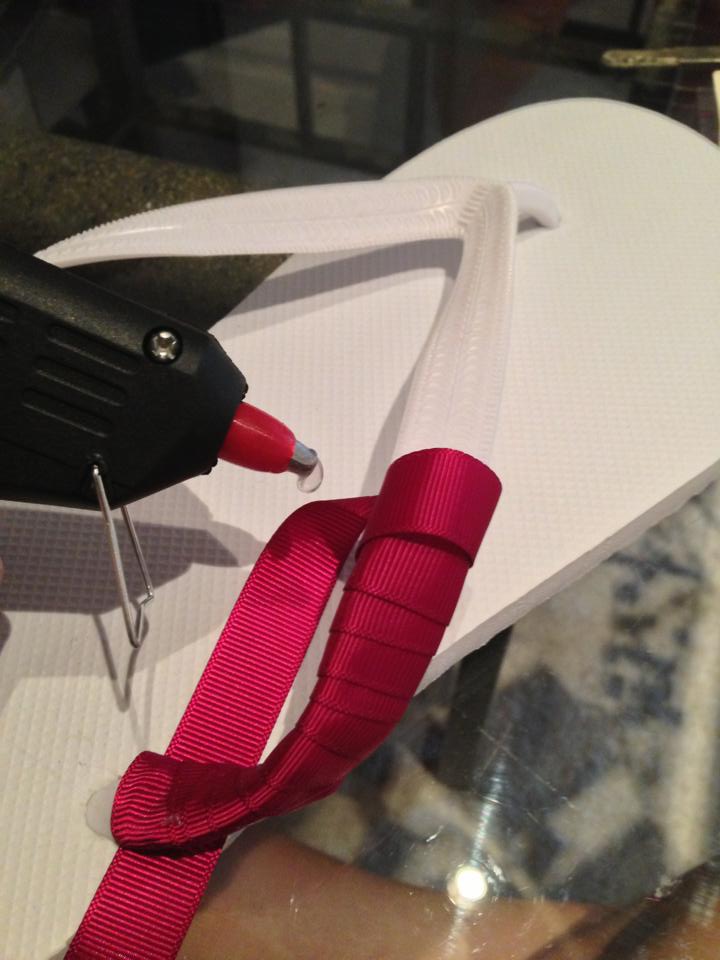
Hot glue as you go! Hot glue is the greatest invention in the history of ever. I hot glued his flip flops about every other time I wrapped them. Just put a little dab of glue on the fabric and wrap the fabric around the glue.
Is your hot glue gun your bff, too? Don’t tell Whit!
When you get to the tip of the thong, trim the ribbon and hot glue the end piece on the underside. This way you don’t have a big frayed piece sticking out. I recommend wrapping each side separately.
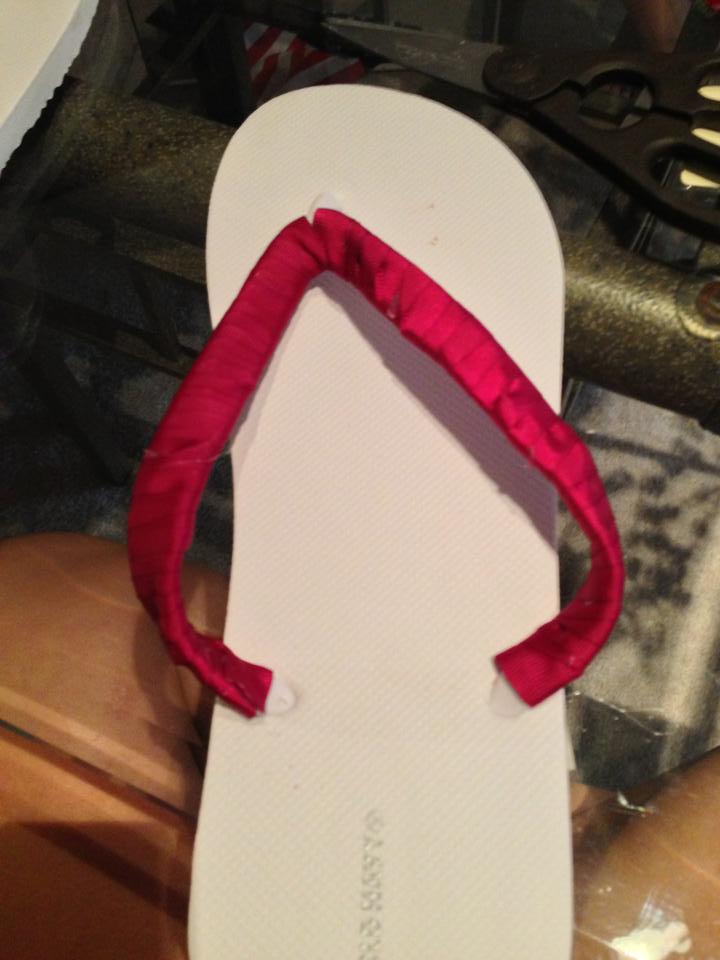
Voila!
Then wrap the other!
Dos!
I wrapped the top of the thong with the opposite color. This is GREAT for sports teams. Most boys aren’t going to wear ribbon flip flops, but if they did this is how they’d do it.

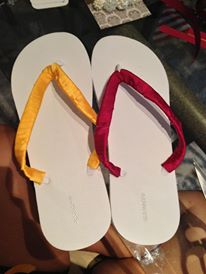
Those are some MAN feet!
Now let’s do some lady shoes!
Start with a pair of flip flops. Obvi.
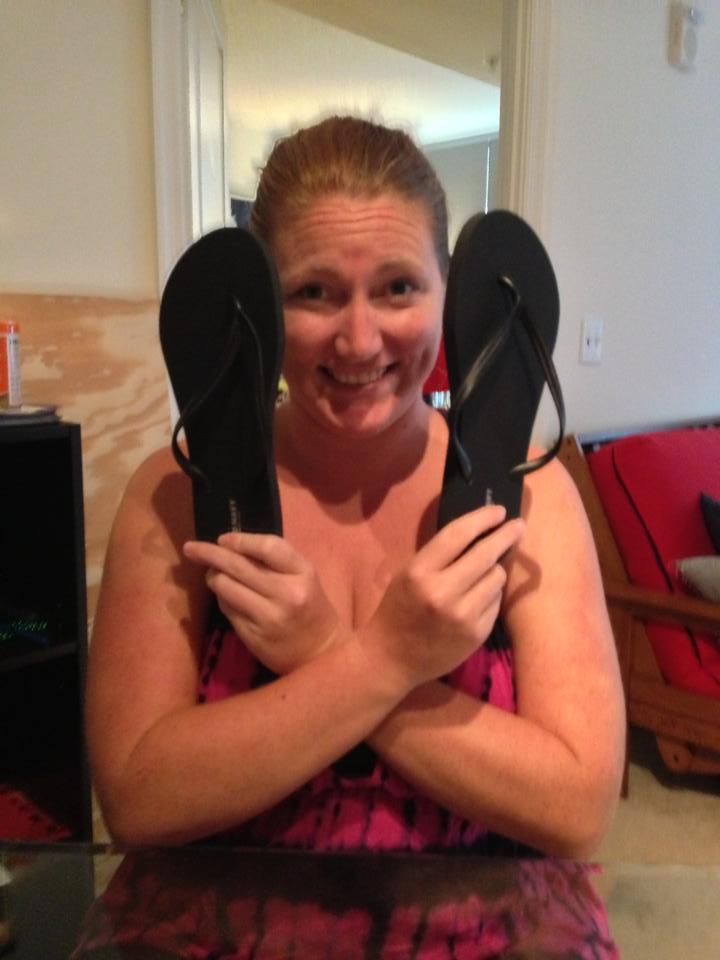
I feel an elephant ear costume is in the works.
Wrap the flip flops in ribbon, much like the first pair.
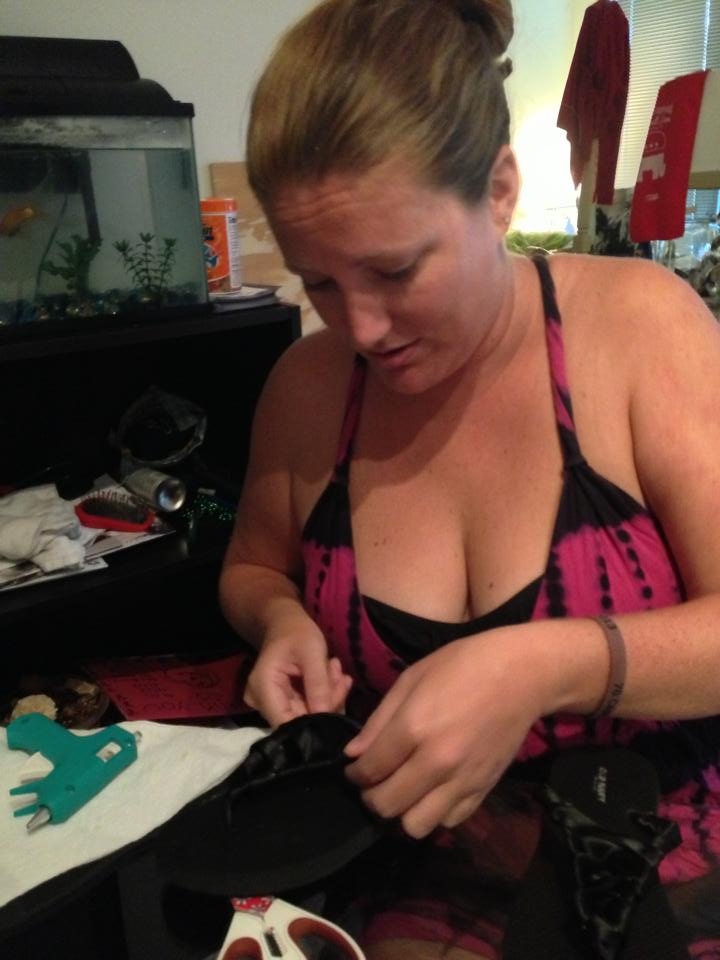
Such concentration!
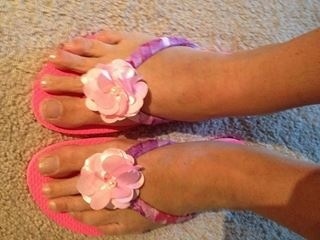
And watch this video as Whitney crosses the ribbon between the two straps to make a bed of ribbon for some bling.
We had a video of me demonstrating how to bling out your flips flips after the ribbon bed is created. Unfortunately, that video is on Whit’s phone and she can no longer find it. Suffice it to say that there was a LOT of hot-gluing of beads onto the ribbon.
And the finished product! These are fairly simple, too. However, I would recommend stitching each bead on if you can/have the time. This pair is falling apart (all the little pearls and jewels are falling off) and it’s only been about 2 weeks. All the other pairs are holding on just fine.
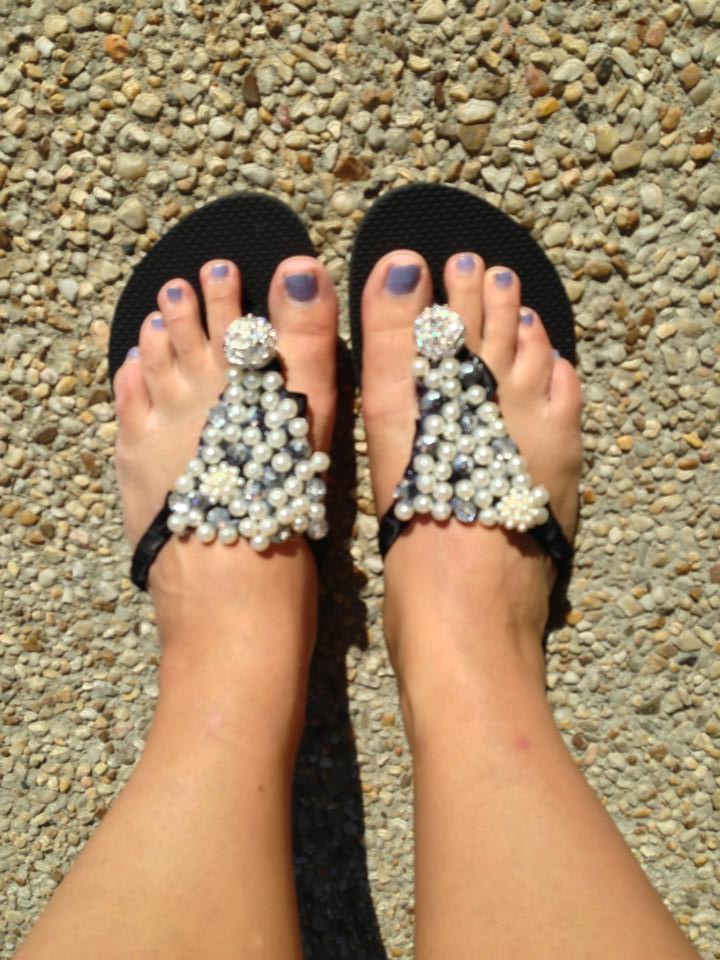
These flips are no flop. Hardy har har.
Now for our last pair!
For this pair, we took fabric and folded it over itself to make an inch long strip.
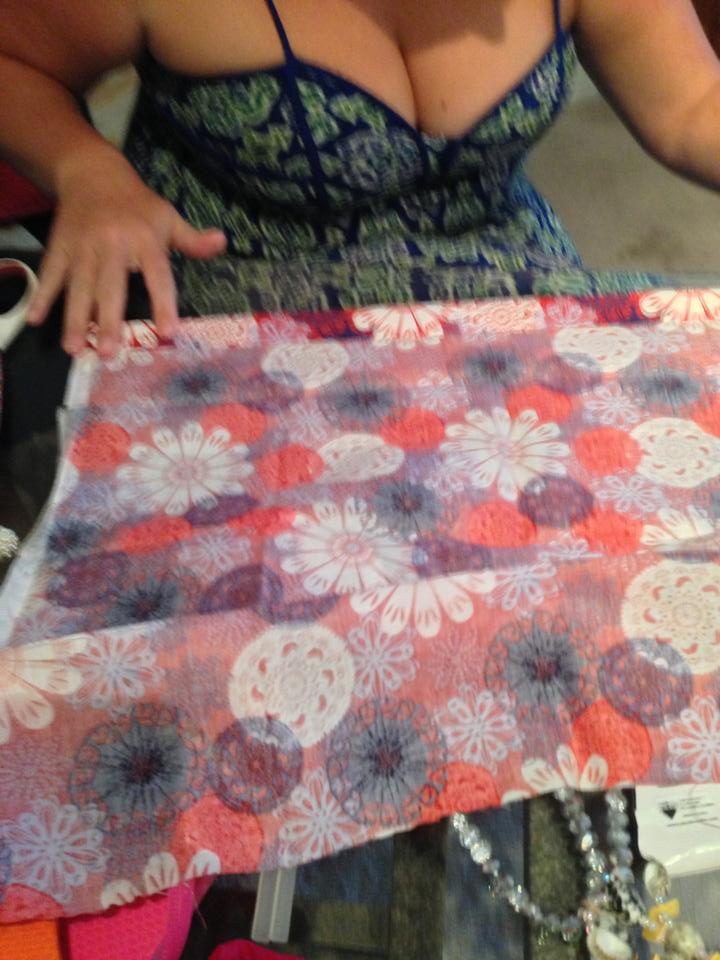
Also, get a friend like Whit who gets hella OCD about straight lines.
Then we “hemmed” the fabric with hot glue. We only glued about 4 inches at a time to ensure that the fabric would stick best. Then we cut the strip away from the rest of the fabric.

With more flip flops in the background.
After, we wrapped the flip flops with the strip of fabric. When gluing for this, make a loop around the base of the flip flop with the fabric and glue the fabric together. As you wrap the flip flop, continuously overlap the fabric and glue the overlapping pieces.
For the next part, we sewed on a little bling. Here is the finished project!
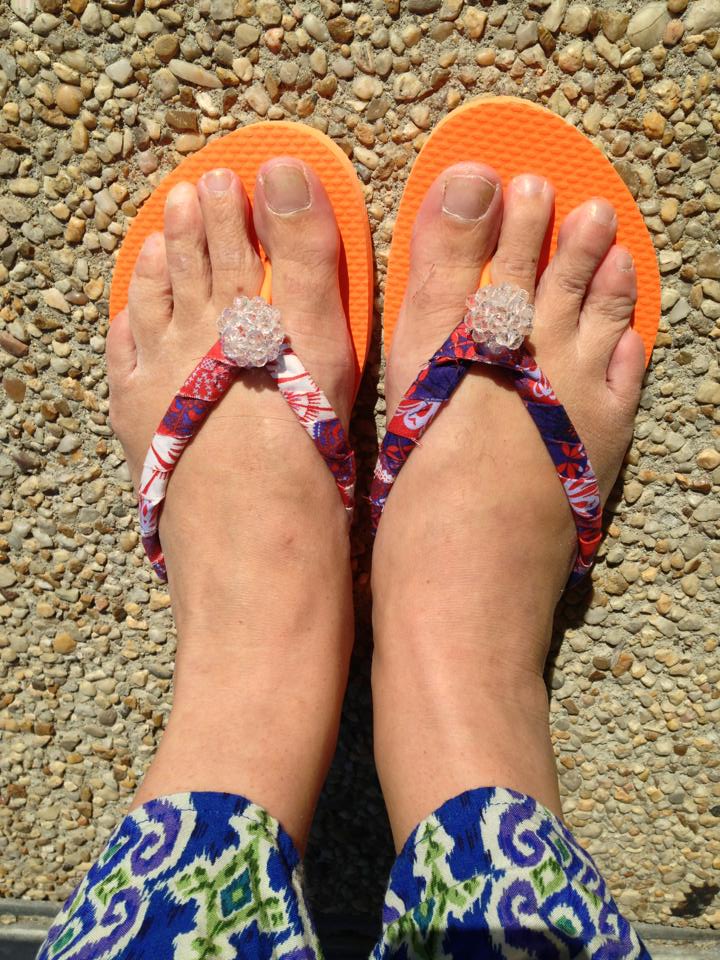
Gorgeous!
Did you like these flip flops? Do you want your own pair? Send us a pic of your flip-flops with your feet like the picture below to flipflopsandfreedom@gmail.com and we’ll enter you into our contest to win this lovely pair.
We’ll also be using pictures of flip-flops in our new re-design, so look for your little feetsies soon!
The sugar free/carb free lifestyle can be boring. And by “can be boring,” I mean I have been bored out of my mind. And all I’ve wanted is a milkshake. Omg, a milkshake. Well, the heavens (google) opened and I found THIS recipe. I altered the recipe just a bit, so let’s see how it turned out.
1.5 cups of almond milk to freeze
1.5 cups of almond milk for the shake
1/2 cup splenda
1 teaspoon vanilla extract
I started with 1.5 cups of almond milk (less than 2g of sugar for every half cup!)

1.5 cups of almond milk.
Then, I poured the almond milk into an ice cube tray…

We definitely did this twice so I could put that apron on.
…and froze it.

You can see where Big Sug hides the carby snacks…out of my reach.
I took a teaspoon of vanilla extract, half a cup of Splenda, and the frozen almond milk and threw them all in the blender.

Everything you need for delicious milkshakes!
Then I added another 1.5 cups of almond milk.

What shape is a measuring cup supposed to be?
And voila! A beautiful milkshake to curb those cravings. Yum Yum!

Yummy! Now I’m craving a milkshake…again.

Evil LG drinks your milkshake.
I love being a Californian in DC. But I hate being a Californian who has to travel back and forth between DC and home. It’s a long, annoying flight and I frequently find myself stuck on a red eye with a screaming baby. This makes for a sleep-deprived and cranky Whit.
Luckily, I have LG to take care of me. When I returned to DC after a trip home last weekend, it had been an entire week (gasp!) since I had seen her. I was in dire need of three things: LG-time, food and sleep. And carb-free LG (I love rhyming) was looking to take her new-found love of cauliflower for a ride and make a cauliflower crust pizza.

Cauliflower boobies – as uneven as real boobies.
The recipe for the cauliflower crust, which LG found here, was pretty easy. You will need 2 cups of grated cauliflower, 2 tbsp of parmesan cheese, 1 cup of mozzerella cheese and 1 egg. We doubled all of the ingredients for our batch. We like leftovers.

The greatest grater.
After you break the cauliflower down into chunks, you will need to grate the florets into smaller crumbles. I was strictly an observer but LG noted that it was extremely easy to grate up. When you’re through, it will resemble chunks of feta cheese. Mmmmm, cheese.

Cheese? Not Cheese? Ahhhh, so confused!!!
LG measured out 4 cups of cauliflower, put it in some cheesecloth to help it dry out and then microwaved it for 8 minutes to soften it up. Then she added in 4 tbsp of parmesan cheese and 2 cups of mozzarella (if you’re doing one batch use 2 tbsp of parmesan and 1 cup of mozzarella). We may have eyeballed the cheese measurement. A little extra won’t hurt anything.

Egg boobies are smaller than cauliflower boobies.
Then LG stirred in 2 eggs. Finally, for her own twist on the recipe, she added in a few shakes of Italian seasoning. I was an extremely helpful taste-tester and then added a couple more shakes. Then she spread the whole mixture evenly over a pizza pan, sprayed it lightly with some cooking spray and stuck in in the oven.

Seriously, it looks just like real dough. That’s my story and I’m sticking to it.
While the crust cooked, LG whipped up some homemade tomato sauce. I’m not going to lie, I wasn’t totally paying attention here, but I think it involved 3 cans of crushed tomatoes thrown into a Vitamixer, then a can of tomato paste added in, and then it was all stirred together and heated up on the stove.

LG loves her (kitchen) toys.
Once the crust was done baking, we pulled it out of the oven to add on all of our toppings. It was a really nice golden brown and smelled AWESOME. We probably could have eaten it right then and there.

Get in my belly.
All that was left to do was add the toppings! We dolloped on the tomato sauce, sprinkled on a bunch of cheese, threw on some fresh basil from LG’s new plant, tossed on the turkey pepperoni that we hadn’t already eaten and finally added on some chopped mushrooms.

Clearly an artiste.
Once the pizza came out of the oven, we dove right in. This might have been our only mistake. The cauliflower crust needs a little time to cool and harden or it crumbles up a bit too easily. However, a slightly crumbled crust did not stop it from tasting AMAZING. And it was shockingly filling. I’m usually in for at least 3 pieces of pizza but I was good and full after only 2!

Might have forgotten to take a final picture in our hurry to eat it. Leftover picture will have to suffice.
It really was an amazingly easy recipe to make and it was exceptionally delicious. I’m not as carb-averse as LG but if all of her recipes taste as good as this one does, she may drag me over to the dark side. And after I got my LG-time and my food, I promptly fell asleep on the couch. Best way ever to recover from a trip home.
LG here! Now that we’ve all fallen in love with cauliflower, let’s have Round II. Cauliflower mash is such a delicious alternative to mashed potatoes. I never thought I could replace mashed potatoes, but boy was I wrong. This recipe is SO easy: a cauliflower, have a packet of cream cheese, butter, and a fork. The fork is for eating the cauliflower mash. I highly recommend using it.
First, wash your cauliflower! Always wash your veggies, and your hands.

Yes, I took a picture of washing cauliflower.
Now, boil some water. Once the water is boiling, throw in the cauliflower. Don’t be like me, though–put it in gently. I may have burned myself. After about 10 minutes take out a piece and see if it crumbles easily. If it does, throw everything back in that strainer.

That weird looking stuff is veggie “meat.” Yes, we go far and beyond just carb free. We’re straight up freaks!
Put the cauliflower back in the pot and get to mashing!

Love Big Sug, but this is def a blurry picture. Apropos?
Now, add in the cream cheese. I’d recommend adding it in slowly. It will make everything more consistent. I, however, do not have that kind of patience.

ALL THE CREAM CHEESE!!!
You are so close. Mash and mash and mash some more! Once it has a steady consistency, throw the butter in there. Mash some more while it melts.

I think this picture beautifully illustrates our height difference.
Add in whatever you like in your mashed potatoes! Garlic? Absolutely! Salt! Pepper! Graaaaaaaavy!!!

We added veggie gravy to this batch. Delicious!
Then get that fork out! It’s so delicious AND it’s a veggie.
Cauliflower is my new miracle veggie. I am not big on sitting down and just eating a vegetable (I prefer candy), so this recipe was perfect for me. I felt as if I was eating a starch, but really I was getting a HUGE serving of veggies. Trick your kids! Trick your friends! Trick yourself! Cauliflower is so versatile, so take it off that antipasto plate and cook it up real good.
We hear all the time from the fashionistas of the world that we only need a few basic pieces, and our wardrobes will have endless possibilities. Yeah right. I collect clothes like hoarders collect free trash. I LOVE shopping, I love having a full closet I can just stare at. However, this means I always have a too-full closet, overflowing drawers, and clothes seemingly decorating my floors (but really–how do clothes end up in the kitchen?!). Maybe there is such a thing as excessive clothing, but I really hope not.
I decided to see if my favorite work dress could really be used for more than just work. This dress is just a little black sheath dress from Gap. I bought it years ago, but I found a similar version at Ann Taylor for your purchasing pleasure. I wear it all the time for work/grown-up events (engagement parties, dinners, yawnyawnyawn), so it seemed like the perfect piece to use. I took three different occasions: a museum trip with my family, a more casual day at work, and a night out with the girls for Whit’s birthday. Let’s see what I did.
Outfit #1: Museums with the Fam
Chambray Shirt (Ann Taylor Loft)
Tights (Amazon–I love Capezio tights; they last forever)
Bobble Necklace (Eastern Market)
Black Flats (Tory Birch)
Yellow Suede handbag (Hand-me-down from my boss)
Bun

I loved this outfit because it was easy, carefree, and yet I didn’t look homeless. It was also nice because I could just take off that chambray shirt and be dinner ready.
Outfit #2: A casual day at work
Gold Studded Belt (Betsy Johnson)
Black Flats (Tory Birch)
Gold Ring (Goodwill find!)
Gold bracelets (B Thrifty and Off Fifth)
Black quilted jacket (Burberry)
Cross body small black purse (Dooney and Burke)
Side Braid

Roaming the cold, hard sidewalks of DC.
This Burberry jacket is my favorite jacket ever. I love it more than I could love a child (not a joke). As you will also notice, I love to wear gold. I will always try to bling out, and this is my way of blinging at work. That studded belt is fun and edgy, but with the dress/flats/jacket combo it tones it down enough to be work appropriate. This is basically my fall/spring wardrobe.
Outfit 3: Whit’s Birthday Dinner
Gold Studded Belt (Betsy Johnson)
Gold Sparkly Pumps (Enzo Angiolini)
Gold bracelets (B Thrifty and Off Fifth)
Black A-line skirt (Ann Taylor Loft)
Pony Tail

I wear these gold shoes more than is socially acceptable.
I’d thought about pairing a dress with a skirt for awhile, but never did it (if you’re wondering what I sit around thinking about…you’re definitely in for some disappointment as I am sitting around thinking about pairing skirts with dresses). I love this outfit, because it accentuates those shoes. My grandmother bought me those shoes. I’m not joking. Best. Grandma. Ever. When I go out with the girls, I want to sparkle, and that night I sparkled (but not more than Whit, because it was her 4th birthday party…of the week…and she outshone even the smores pie).
What amazes me about these three outfits is that it’s just 4 pieces of clothing overall: the dress, the shirt, the jacket, and the skirt, but I could get 3 very different outfits out of it. This is useful when traveling, on a budget, or when you have very little closet space.
Try taking one piece and basing a few different outfits off of it. We’d love to know how you did–so tell us in the comments or shoot us a message!
We are Central Valley natives–we can’t even claim Southern Californian, much less south-of-the-Mason-Dixon Southern. At Taste of the South, however, everyone gets to be Southern for one night. Taste of the South is an annual soirée to benefit a number of Southern charities. It’s one of our favorite events of the year! Each state provides local food and beverage (and swag!!!).
One of the best parts of TOTS is getting dressed up. I am a hair person: I love any opportunity to play with hair. Here are a couple up-dos I did for the event.
Whitney has shoulder length, thick hair. And when I say thick, I mean thick. I may have a quarter of the hair she has. If I had Whit’s hair growing talents, I’d go full Rapunzel. I digress. This style looks complicated, but it’s not. That’s the best type. Really tight up-dos aren’t super in right now (except the beloved sock bun), so I went for a look that seemed polished, but not overdone.
I started by putting tight spiral curls in 6 layers of Whit’s hair.

Our own little Shirley Temple!
Then I ran my fingers through each curl.

Kinda 1950’s housewife fabulous?
Then I pinned the curls into what I’ve started calling a curl-hawk. I made sure that none of the curls were pinned down too tightly. Next I gathered the hair at the bottom of her neck into a low-ponytail and pinned it under.
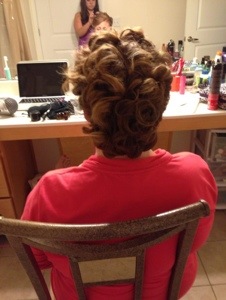
The curl-hawk is here to stay!
Next, I tackled our friend Leslie’s hair. Leslie had already curled her hair. All I did was a low topsy-turvy ponytail. Then I pinned the bottom of the ponytail over the topsy-turvy loop. Easy, simple, and super elegant. This took, maybe 5 minutes.

…and an awkward LG taking a photo in the mirror.
Remember, when getting ready properly you MUST take all the obligatory pics!!!
Like the group shot:
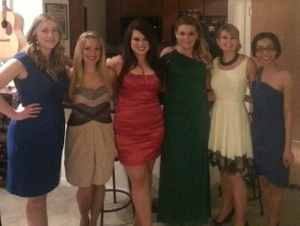
Where are we supposed to look?
Or the “awkward prom” pic:

I’d make fun, but this is one of my favorites ever.
Or the “stacked friend” pic:
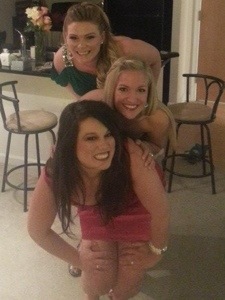
Always crop this pic. Otherwise, you look like a small stack of friends in a large room.
Now you’re ready to have fun!

No red-eye = No fun!
Thanks to Leslie for the invite/ticket/letting me borrow a cocktail dress. It ended up being somewhat of a girls’ night, which just made it that much more fun. TOTS was such a spectacular event! Congrats to the committees for their hard work! If you’re interested in going next year, check out the Taste of the South website. We promise, you will have a fabulous time and support some great causes.
