We know, we know. Its the end of summer. But hey, look at your feet! Are you wearing flip flops? Of course you are. It’s only September. Why on earth would you be wearing anything else? We love flip flops so much we named our blog after them (clearly, we also love freedom). We’ve all seen the Pinterest boards with DIY flip flops, and we said to ourselves, “Hey! They’re not better than us!” So we took a trip to the craft store (obvi) and Old Navy ($2 flip flops!!!) to see if that was just crafting hubris.

Craft stores love me.
Something I would recommend is planning out your flippy floppies beforehand. It IS a lot of fun to run in and grab everything you see that would be pretty to hot glue onto a flip flop, but when you walk out of the store $75 later you may have some buyers’ remorse. KIDDING! Who would get buyers’ remorse at a craft store? That’s like saying you can get buyers’ remorse from Michael Kors. IT. JUST. DOESN’T. HAPPEN. However, if you are one of the few that is plagued by this increasingly prevalent infliction (thanks US economy!), I would recommend going in with a plan.
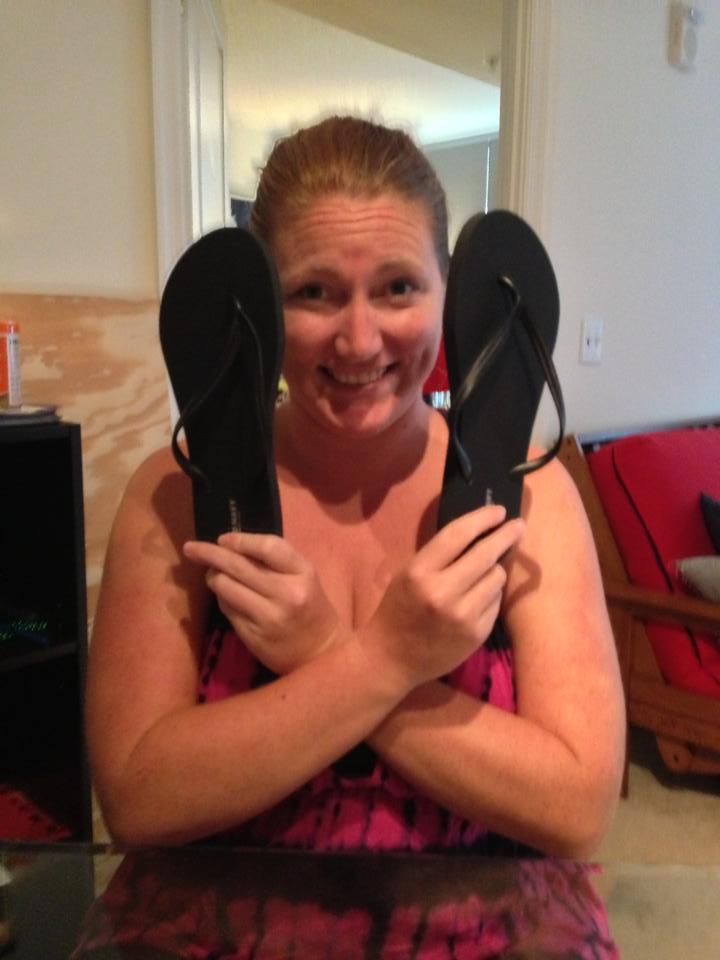
Let’s start off with a simple pair of flip flops. I made these for Big Sug. He is a big football fan. Can you guess his team? The ribbon wrapped flip flops are by far the easiest.
First, hot glue or stitch the ribbon to itself at the base of the thong. It has a better chance at survival if you wrap it and glue it to itself than wrapping and gluing to the plastic. Especially since it’s plastic. And the glue is hot. Hot plastic is NOT what’s up.
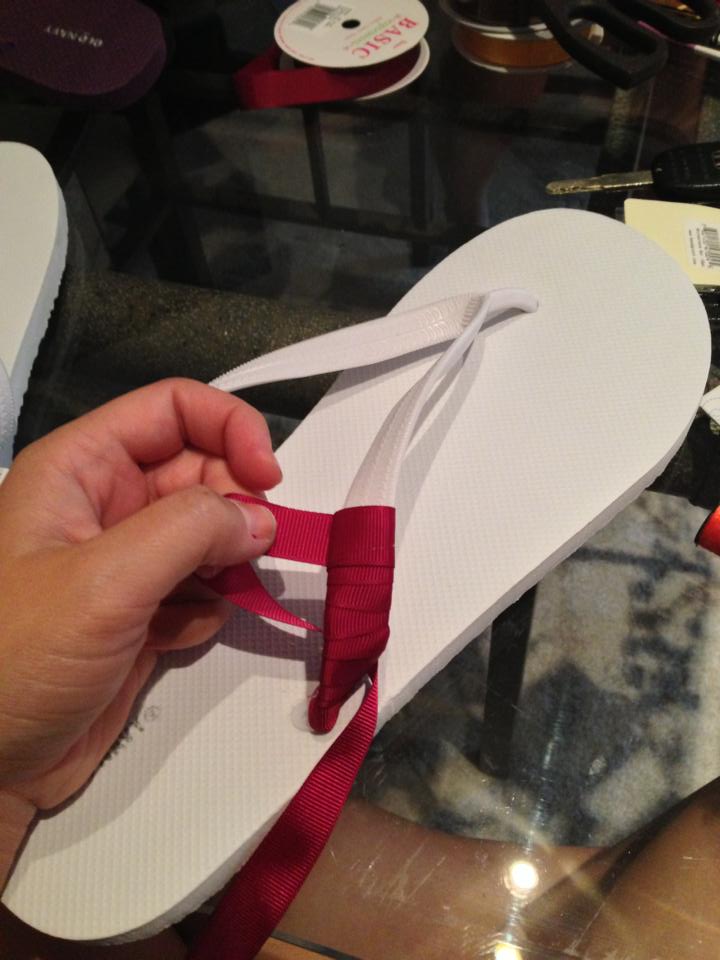
My feet are big…but these are definitely for Big Sug.
Hot glue as you go! Hot glue is the greatest invention in the history of ever. I hot glued his flip flops about every other time I wrapped them. Just put a little dab of glue on the fabric and wrap the fabric around the glue.
Is your hot glue gun your bff, too? Don’t tell Whit!
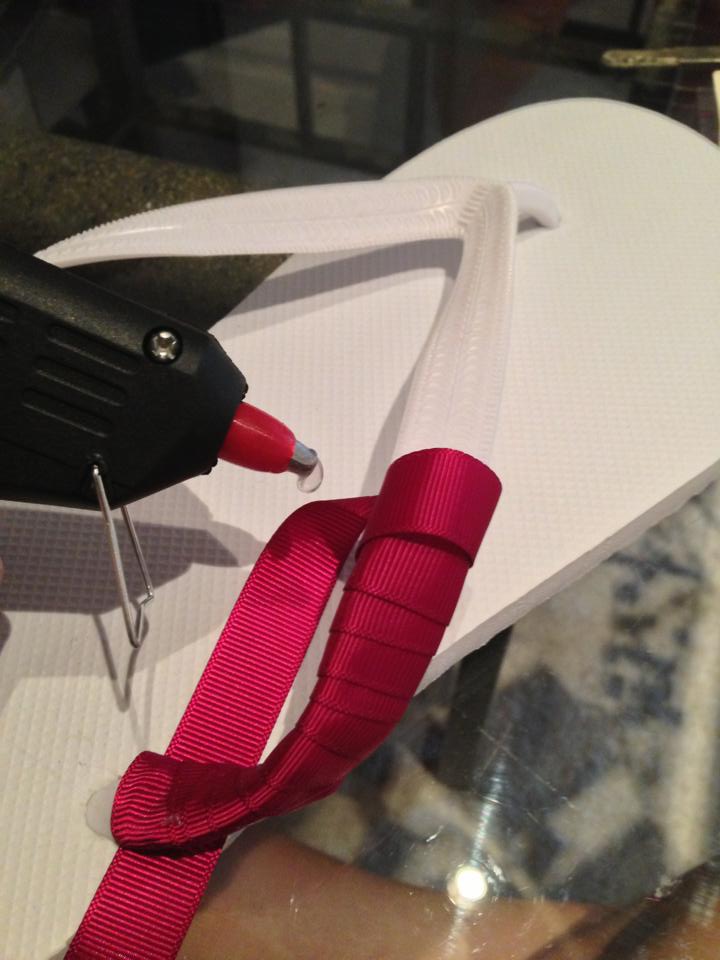
When you get to the tip of the thong, trim the ribbon and hot glue the end piece on the underside. This way you don’t have a big frayed piece sticking out. I recommend wrapping each side separately.
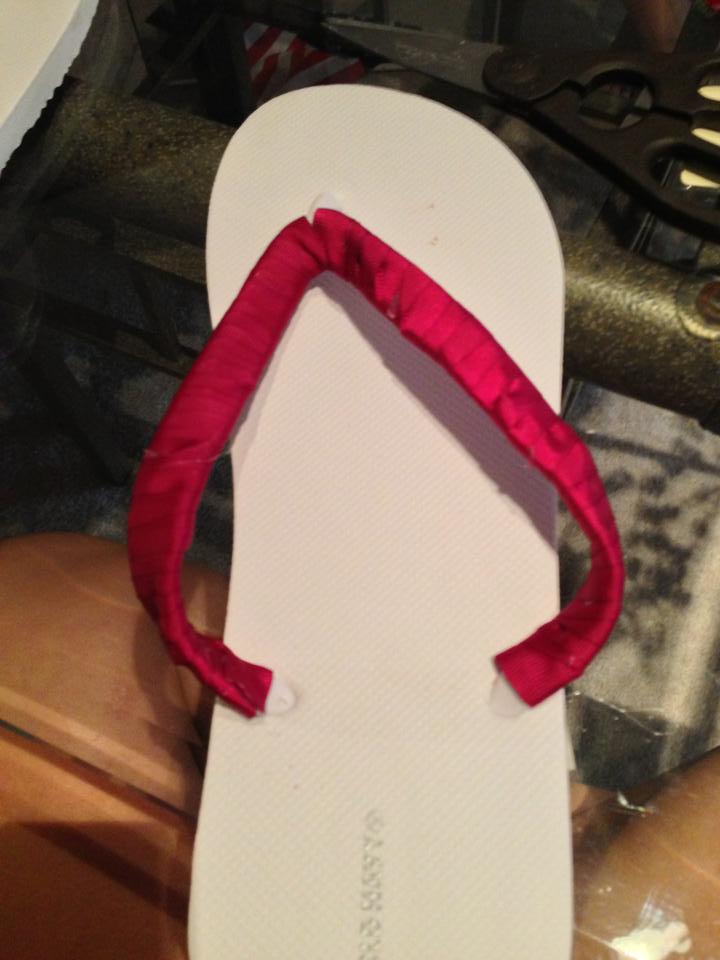
Voila!
Then wrap the other!
Dos!
I wrapped the top of the thong with the opposite color. This is GREAT for sports teams. Most boys aren’t going to wear ribbon flip flops, but if they did this is how they’d do it.

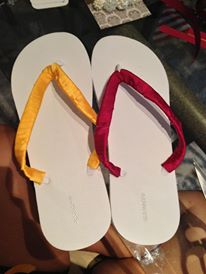
Those are some MAN feet!
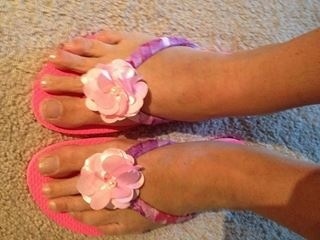
Now let’s do some lady shoes!
Start with a pair of flip flops. Obvi.
I feel an elephant ear costume is in the works.
Wrap the flip flops in ribbon, much like the first pair.
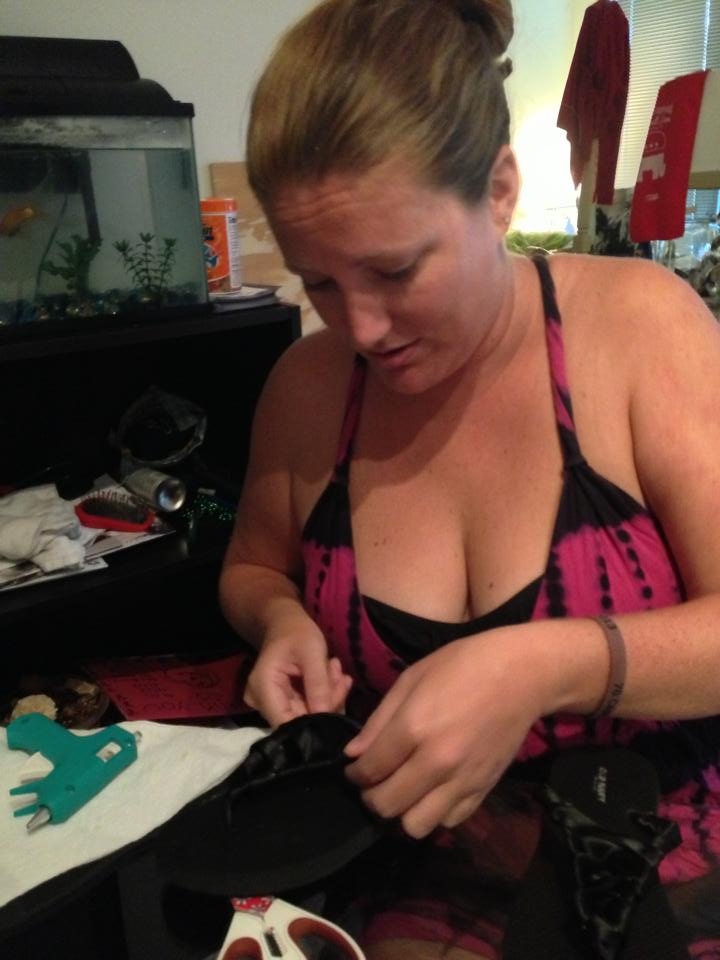
Such concentration!
And watch this video as Whitney crosses the ribbon between the two straps to make a bed of ribbon for some bling.
We had a video of me demonstrating how to bling out your flips flips after the ribbon bed is created. Unfortunately, that video is on Whit’s phone and she can no longer find it. Suffice it to say that there was a LOT of hot-gluing of beads onto the ribbon.
And the finished product! These are fairly simple, too. However, I would recommend stitching each bead on if you can/have the time. This pair is falling apart (all the little pearls and jewels are falling off) and it’s only been about 2 weeks. All the other pairs are holding on just fine.
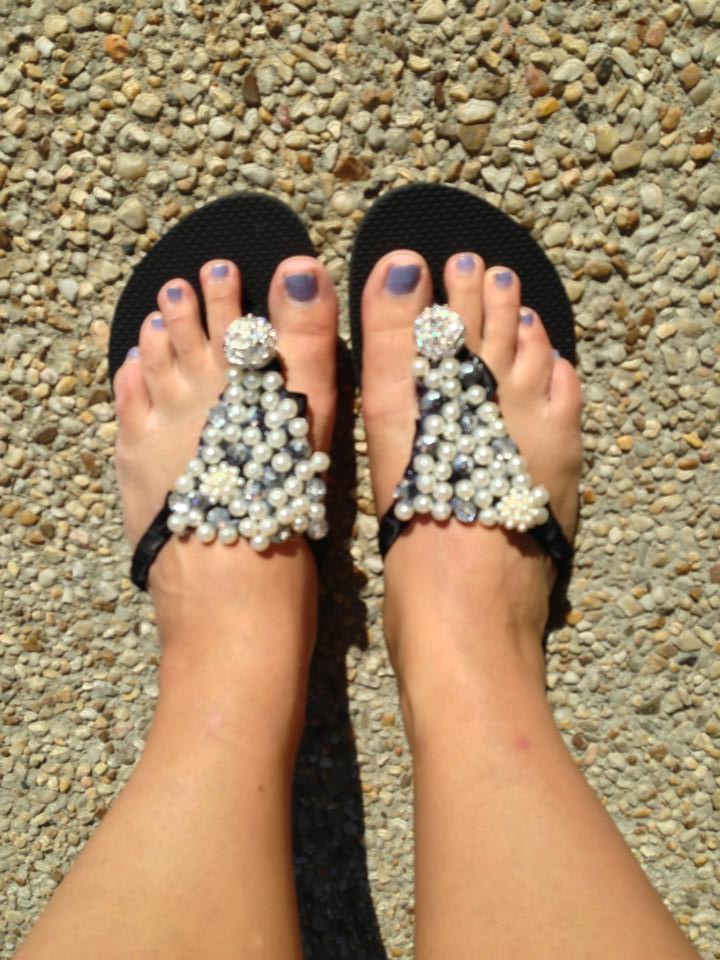
These flips are no flop. Hardy har har.
Now for our last pair!
For this pair, we took fabric and folded it over itself to make an inch long strip.
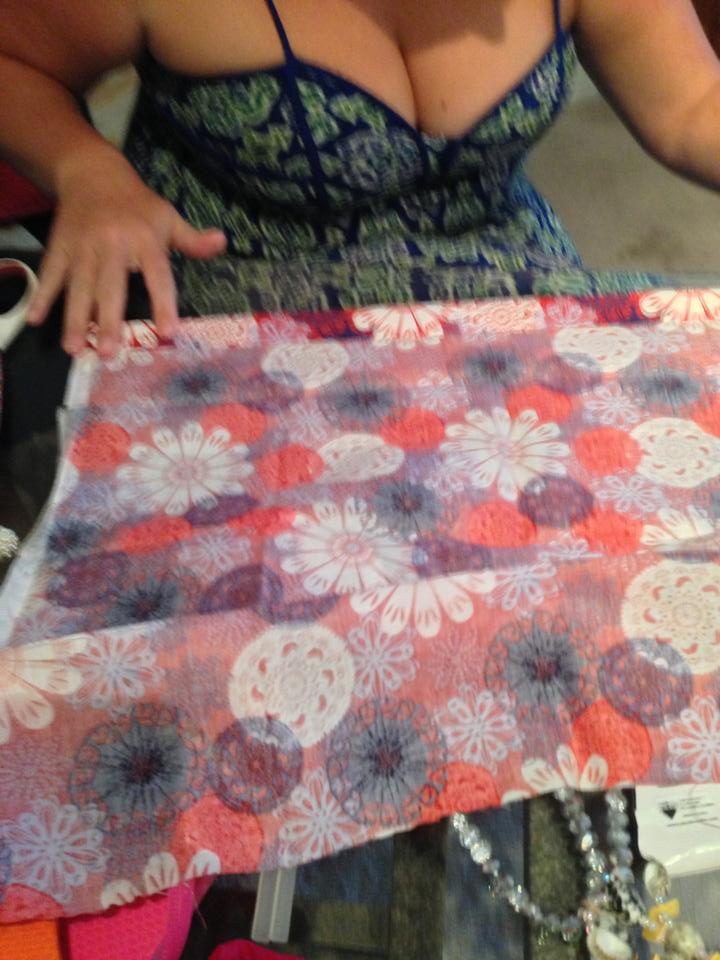
Also, get a friend like Whit who gets hella OCD about straight lines.
Then we “hemmed” the fabric with hot glue. We only glued about 4 inches at a time to ensure that the fabric would stick best. Then we cut the strip away from the rest of the fabric.

With more flip flops in the background.
After, we wrapped the flip flops with the strip of fabric. When gluing for this, make a loop around the base of the flip flop with the fabric and glue the fabric together. As you wrap the flip flop, continuously overlap the fabric and glue the overlapping pieces.
For the next part, we sewed on a little bling. Here is the finished project!
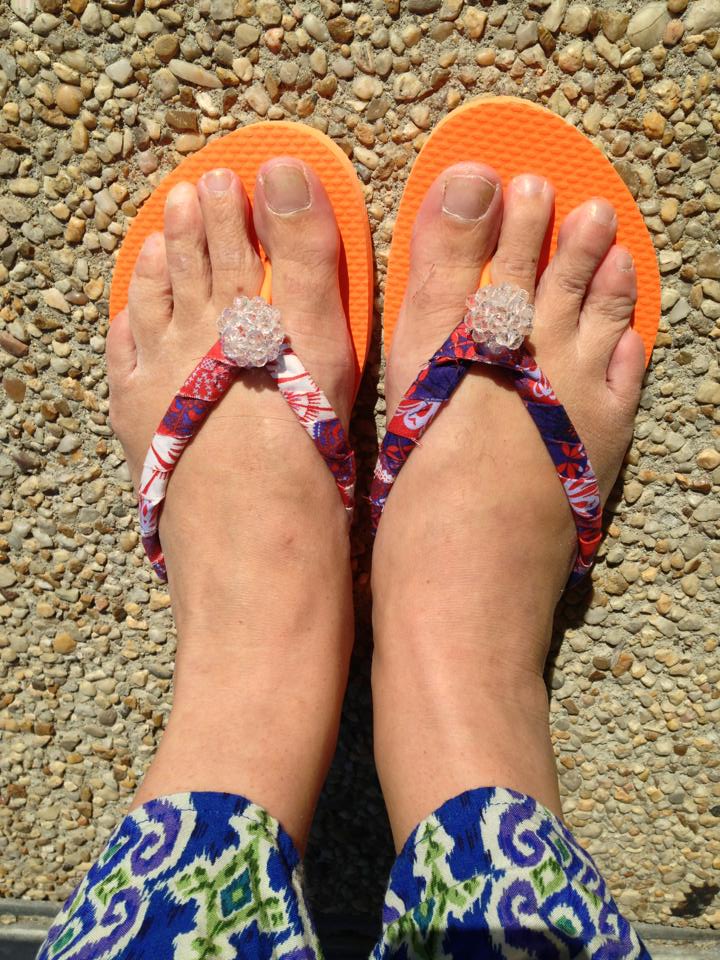
Gorgeous!
Did you like these flip flops? Do you want your own pair? Send us a pic of your flip-flops with your feet like the picture below to flipflopsandfreedom@gmail.com and we’ll enter you into our contest to win this lovely pair.
We’ll also be using pictures of flip-flops in our new re-design, so look for your little feetsies soon!
